
Add a machine to CAM Assist, or change one you've added, so cutting parameters and cycle times match your shop. Machines you add are shared with your organization.
Add a machine
- Click My Shop in the header, then Machines.
- Click Add machine.
- Enter a Machine name (unique, up to 128 characters), or start typing and pick a suggestion to fill in the manufacturer, model and kinematics.
- Leave Add to favorites, so it appears in Assessment on, so the machine is listed first when you pick a machine for a part.
- Fill in every Kinematics field. See Machine details CAM Assist needs for units and limits.
- Under Preferences, choose the Machining modes this machine can run. Optionally pick its Tool libraries and Tool capacity.
- If you chose a 3+1 or 3+2 mode, open Rotational axis limits and enter the limits.
- Optionally open Cycle time adjustment to match your real cycle times.
- Click Add machine.
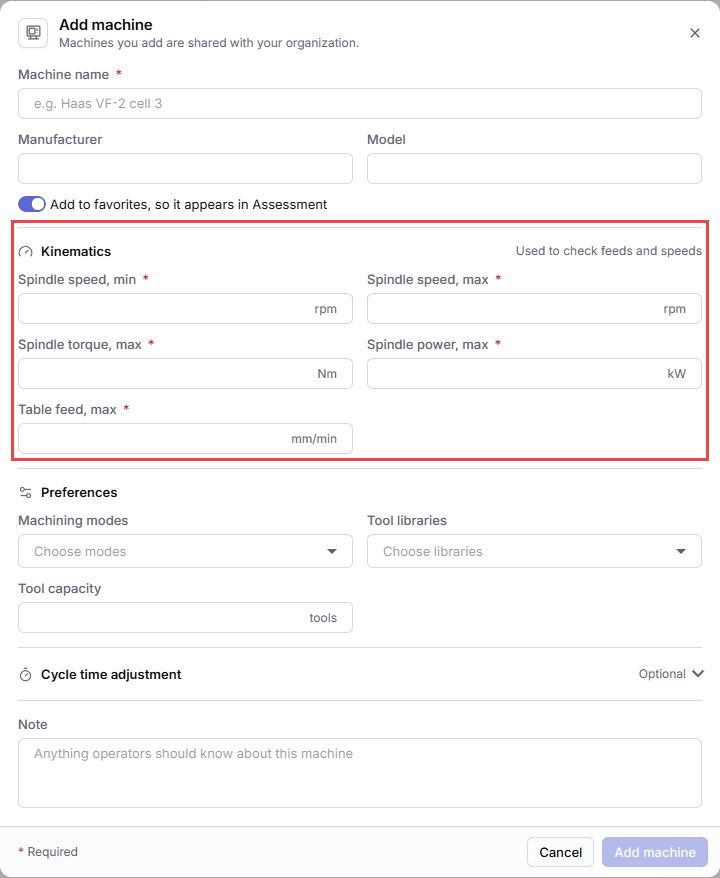
If Add machine is greyed out, hover over it to see which field needs fixing. A collapsed section with a problem shows a warning icon ("This section contains errors").
You can also add a machine while you set up a part: in the Assessment stage, open the Machine list and click Add machine. CAM Assist selects the new machine for the part when you save it.
Edit a machine
- In My Shop > Machines, click ⋯ next to the machine and choose Edit. Or double-click the row.
- Make your changes and click Done.
From the Assessment stage, click the pencil next to the selected machine to edit it in the same dialog.
Built-in CloudNC machines open as View machine and can't be changed. Choose Duplicate instead and edit the copy.
Keep a machine from your CAM package
In Autodesk Fusion, Mastercam and SolidCAM, the machine set for your part appears as a session machine, marked From CAM session. Fields set by your CAM package can only be changed there. To keep it as one of your own machines, click ⋯ > Save as.